LAMP là gì?
LAMP là một nhóm phần mềm nguồn mở được cài đặt cùng nhau (tương tự như LEMP) để tạo nên một môi trường máy chủ Web có khả năng chứa và phân phối các trang Web động. Thuật ngữ này là một từ viết tắt đại diện cho hệ điều hành Linux, với máy chủ web Apache, máy chủ cơ sở dữ liệu MariaDB hoặc MySQL và nội dung động được xử lý bởi PHP.
Cài đặt LAMP Stack
Bước 1: cài đặt Apache
Trước tiên chúng ta cần cài đặt Epel repository
root@systuts:~# yum install epel-release
Bây giờ kho lưu trữ EPEL đã được cài đặt trên máy chủ của bạn, hãy cài đặt Nginx bằng lệnh yum sau:
root@systuts:~# yum install -y httpd
Khi quá trình cài đặt hoàn tất, chúng ta cần khởi động NGINX và cho phép tự khởi động khi boot bằng lệnh sau:
root@systuts:~# systemctl enable httpd
root@systuts:~# systemctl start httpd
Mở port HTTP và HTTPS trên Firewalld và kiểm tra truy cập:
root@systuts:~# firewall-cmd --permanent --add-service=http
root@systuts:~# firewall-cmd --permanent --add-service=https
root@systuts:~# firewall-cmd --reload
Bước 2: cài đặt MariaDB Server
yum install -y mariadb-server mariadb
root@systuts:~# yum install -y mariadb-server mariadb
Khi quá trình cài đặt hoàn tất, chúng ta cần khởi động MariaDB và cho phép tự khởi động khi boot bằng lệnh sau:
root@systuts:~# systemctl enable mariadb
root@systuts:~# systemctl start mariadb
Bây giờ MariaDB Server của chúng ta đã chạy, bước tiếp theo chúng ta cần bảo mật cho MariaDB Server bằng cách chạy lệnh sau:
root@systuts:~# mysql_secure_installation
NOTE: RUNNING ALL PARTS OF THIS SCRIPT IS RECOMMENDED FOR ALL MariaDB
SERVERS IN PRODUCTION USE! PLEASE READ EACH STEP CAREFULLY!
In order to log into MariaDB to secure it, we'll need the current
password for the root user. If you've just installed MariaDB, and
you haven't set the root password yet, the password will be blank,
so you should just press enter here.
Enter current password for root (enter for none):
OK, successfully used password, moving on…
Setting the root password ensures that nobody can log into the MariaDB
root user without the proper authorisation.
Set root password? [Y/n] Y
New password:
Re-enter new password:
Password updated successfully!
Reloading privilege tables..
… Success!
By default, a MariaDB installation has an anonymous user, allowing anyone
to log into MariaDB without having to have a user account created for
them. This is intended only for testing, and to make the installation
go a bit smoother. You should remove them before moving into a
production environment.
Remove anonymous users? [Y/n] Y
… Success!
Normally, root should only be allowed to connect from 'localhost'. This
ensures that someone cannot guess at the root password from the network.
Disallow root login remotely? [Y/n] Y
… Success!
By default, MariaDB comes with a database named 'test' that anyone can
access. This is also intended only for testing, and should be removed
before moving into a production environment.
Remove test database and access to it? [Y/n] Y
Dropping test database…
… Success!
Removing privileges on test database…
… Success!
Reloading the privilege tables will ensure that all changes made so far
will take effect immediately.
Reload privilege tables now? [Y/n] Y
… Success!
Cleaning up…
All done! If you've completed all of the above steps, your MariaDB
installation should now be secure.
Thanks for using MariaDB!
Bước 3: cài đặt PHP xử lý file động
Phiên bản PHP có sẵn theo mặc định trong các máy chủ CentOS 7 đã lỗi thời và vì lý do đó, chúng ta sẽ cần cài đặt kho lưu trữ gói của bên thứ ba để có được PHP 7+ và cài đặt nó trên máy chủ CentOS 7 của bạn.
Remi là kho lưu trữ gói phổ biến cung cấp các bản phát hành PHP cập nhật nhất cho các máy chủ CentOS để cài đặt kho Remi cho CentOS 7, hãy chạy:
root@systuts:~# yum install -y yum-utils http://rpms.remirepo.net/enterprise/remi-release-7.rpm
Sau khi cài đặt xong, bạn sẽ cần chạy một lệnh để kích hoạt kho lưu trữ chứa phiên bản PHP ưa thích của bạn.
Note: bạn có thể cài đặt các phiên bản php khác bằng cách thay số hiệu phiên bản như sau: yum-config-manager --enable remi-php[number]
Trong hướng dẫn này, chúng ta sẽ cài đặt PHP 7.4, hiện là phiên bản ổn định được cập nhật nhất của PHP. Để kích hoạt gói Remi chính xác để cài đặt PHP 7.4, hãy chạy:
Bây giờ chúng ta có thể tiến hành sử dụng yum để cài đặt PHP như bình thường. Lệnh sau sẽ cài đặt tất cả các gói cần thiết để cài đặt PHP 7.4 trong Apache và cho phép nó kết nối với cơ sở dữ liệu dựa trên MariaDB:
root@systuts:~# yum-config-manager --enable remi-php74
root@systuts:~# yum install -y php php-gd php-json php-mbstring php-mysqlnd php-xml php-xmlrpc php-opcache php-mysql
Để xác nhận rằng PHP có sẵn như là phiên bản bạn đã chọn, hãy chạy:
root@systuts:~# php --version
PHP 7.4.11 (cli) (built: Sep 29 2020 10:17:06) ( NTS )
Copyright (c) The PHP Group
Zend Engine v3.4.0, Copyright (c) Zend Technologies
    with Zend OPcache v7.4.11, Copyright (c), by Zend Technologies
PHP hiện đã được cài đặt thành công trên hệ thống của bạn. Tiếp theo, chúng ta cần thực hiện một vài điều chỉnh cho cấu hình mặc định.
Bước 4: cấu hình virtual host Apache
Chỉnh sửa file default.conf, nếu không có thì tạo mới bằng lệnh:
root@systuts:~# vi /etc/httpd/conf.d/default.conf
Dán đoạn cấu hình sau vào default.conf và thay your_domain bằng tên miền của bạn.
<VirtualHost *:80>
        ServerAdmin webmaster@localhost
        ServerName your_domain
        ServerAlias www.your_domain
        DocumentRoot /var/www/html/
        ErrorLog /var/log/httpd/your_domain_error.log
        CustomLog /var/log/httpd/your_domain_access.log combined
</VirtualHost>
Lưu config và restart lại Apache:
root@systuts:~# systemctl restart apache
Bước 5: Upload website và kiểm tra
Như vậy, sau khi hoàn tất các bước trên bạn đã có cho mình một Web Server LAMP cơ bản có thể chạy được website.
Bước tiếp theo chúng ta cần tạo 1 trang web mẫu để kiểm tra, chạy lệnh:
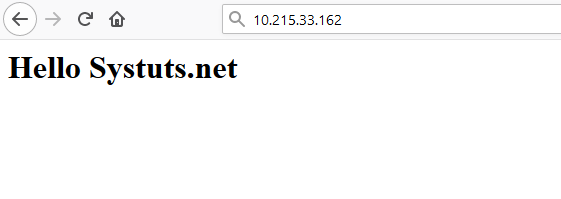
root@systuts:~# touch /var/www/html/index.php | echo "Hello Systuts.net';?>" > /var/www/html/index.php
Sau khi hoàn tất, các bạn mở trình duyệt và truy cập IP của Server hoặc domain để hiển thị trang web:
Note: Sau khi trang web hiển thị thành công các bạn đã có thể upload source code website của các bạn lên server.
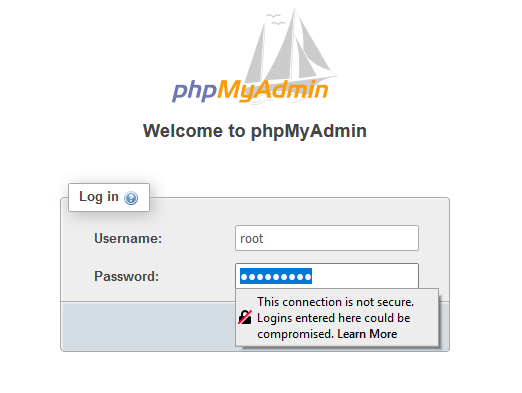
Bước 6: cài đặt phpmyadmin quản lý database
Các bạn cài đặt phpmyadmin về bằng lệnh:
root@systuts:~# yum install -y phpmyadmin
Chỉnh sửa file phpMyadmin.conf
root@systuts:~# vi /etc/httpd/conf.d/phpMyAdmin.conf
Thêm dòng Require all granted như bên dưới:
...
Alias /phpMyAdmin /usr/share/phpMyAdmin
Alias /phpmyadmin /usr/share/phpMyAdmin

<Directory /usr/share/phpMyAdmin/>
   AddDefaultCharset UTF-8

   <IfModule mod_authz_core.c>
     # Apache 2.4
     <RequireAny>
       Require ip 127.0.0.1
       Require ip ::1
      Require all granted
     </RequireAny>
   </IfModule>
   <IfModule !mod_authz_core.c>
     # Apache 2.2
     Order Deny,Allow
     Deny from All
     Allow from 127.0.0.1
     Allow from ::1
   </IfModule>
</Directory>

<Directory /usr/share/phpMyAdmin/setup/>
   <IfModule mod_authz_core.c>
     # Apache 2.4
     <RequireAny>
       Require ip 127.0.0.1
       Require ip ::1
        Require all granted
     </RequireAny>
   </IfModule>
   <IfModule !mod_authz_core.c>
     # Apache 2.2
     Order Deny,Allow
     Deny from All
     Allow from 127.0.0.1
     Allow from ::1
   </IfModule>
</Directory>
...
Save lại và restart apache, mở trình duyệt và nhập vào đường dẫn: http://your_ip_address/phpmyadmin nhập vào username root và password của MariaDB đã cài đặt ở bước 2.